Fine-Tuning UI
This guide explains how to explore, create, and manage fine‑tuning projects and jobs in SeekrFlow using the web interface. It complements the SDK workflow by showing the point‑and‑click equivalent
Open the Projects workspace
- Sign in to apps.seekr.com/flow.
- In the left navigation bar, under Development, click Fine‑tuning .The Fine‑Tuning Projects page appears (see Figure 1).
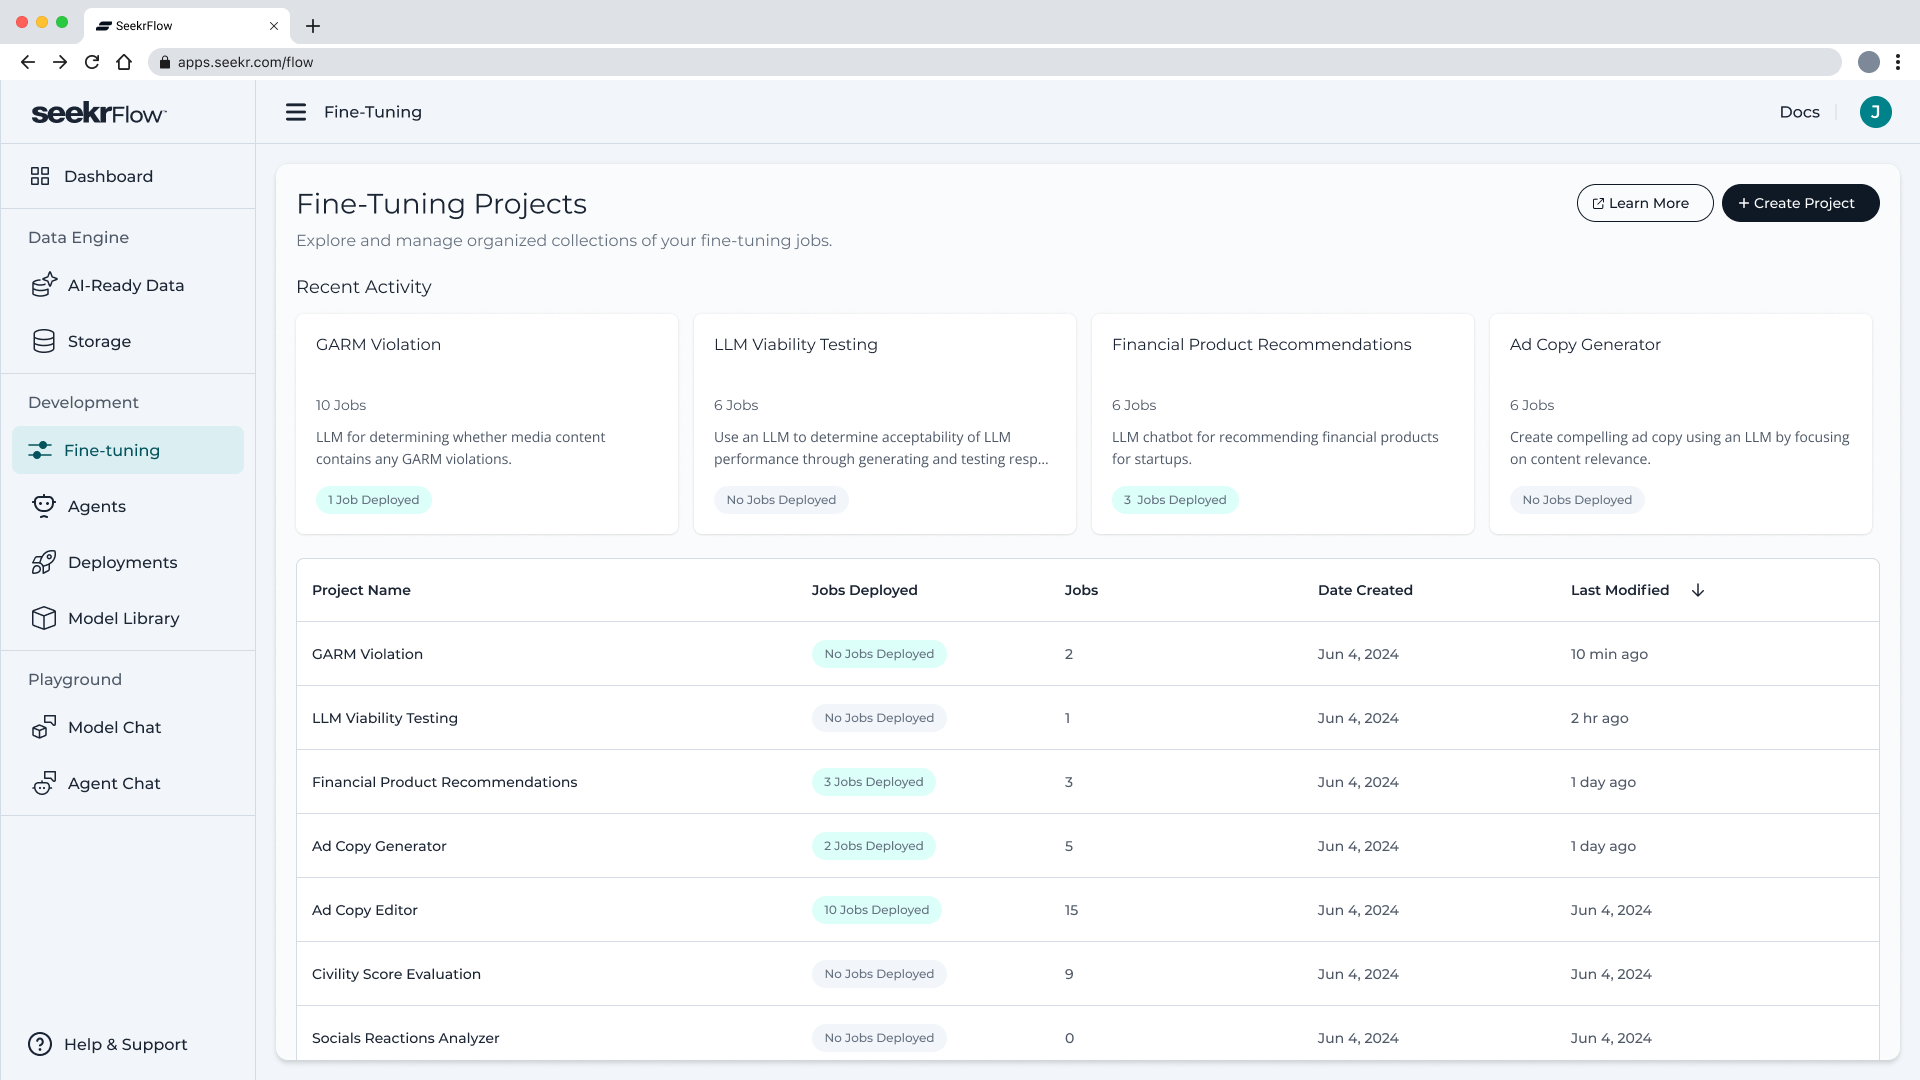
Figure 1. Fine‑Tuning Projects landing page with Recent Activity cards and project table.
Understand the layout
| UI Region | What You See |
|---|---|
| Recent Activity cards | Up to four project cars showing name, description, number of jobs, and a Jobs Deployed badge. |
| Projects table | Jobs Deployed – badge count of jobs promoted to production• Jobs – total jobs in project• Date Created & Last Modified |
| Global actions | Learn More link to docs and + Create Project button |
Create a new fine‑tuning project
- Click + Create Project (top‑right).
- Enter a Project Name and optional Description.
- Click Create. The new project appears in both the Recent Activity cards and the table.
Tip: A project is simply an organized container for one or more fine‑tuning jobs that share a business goal (e.g., “GARM Violation Classifier”).
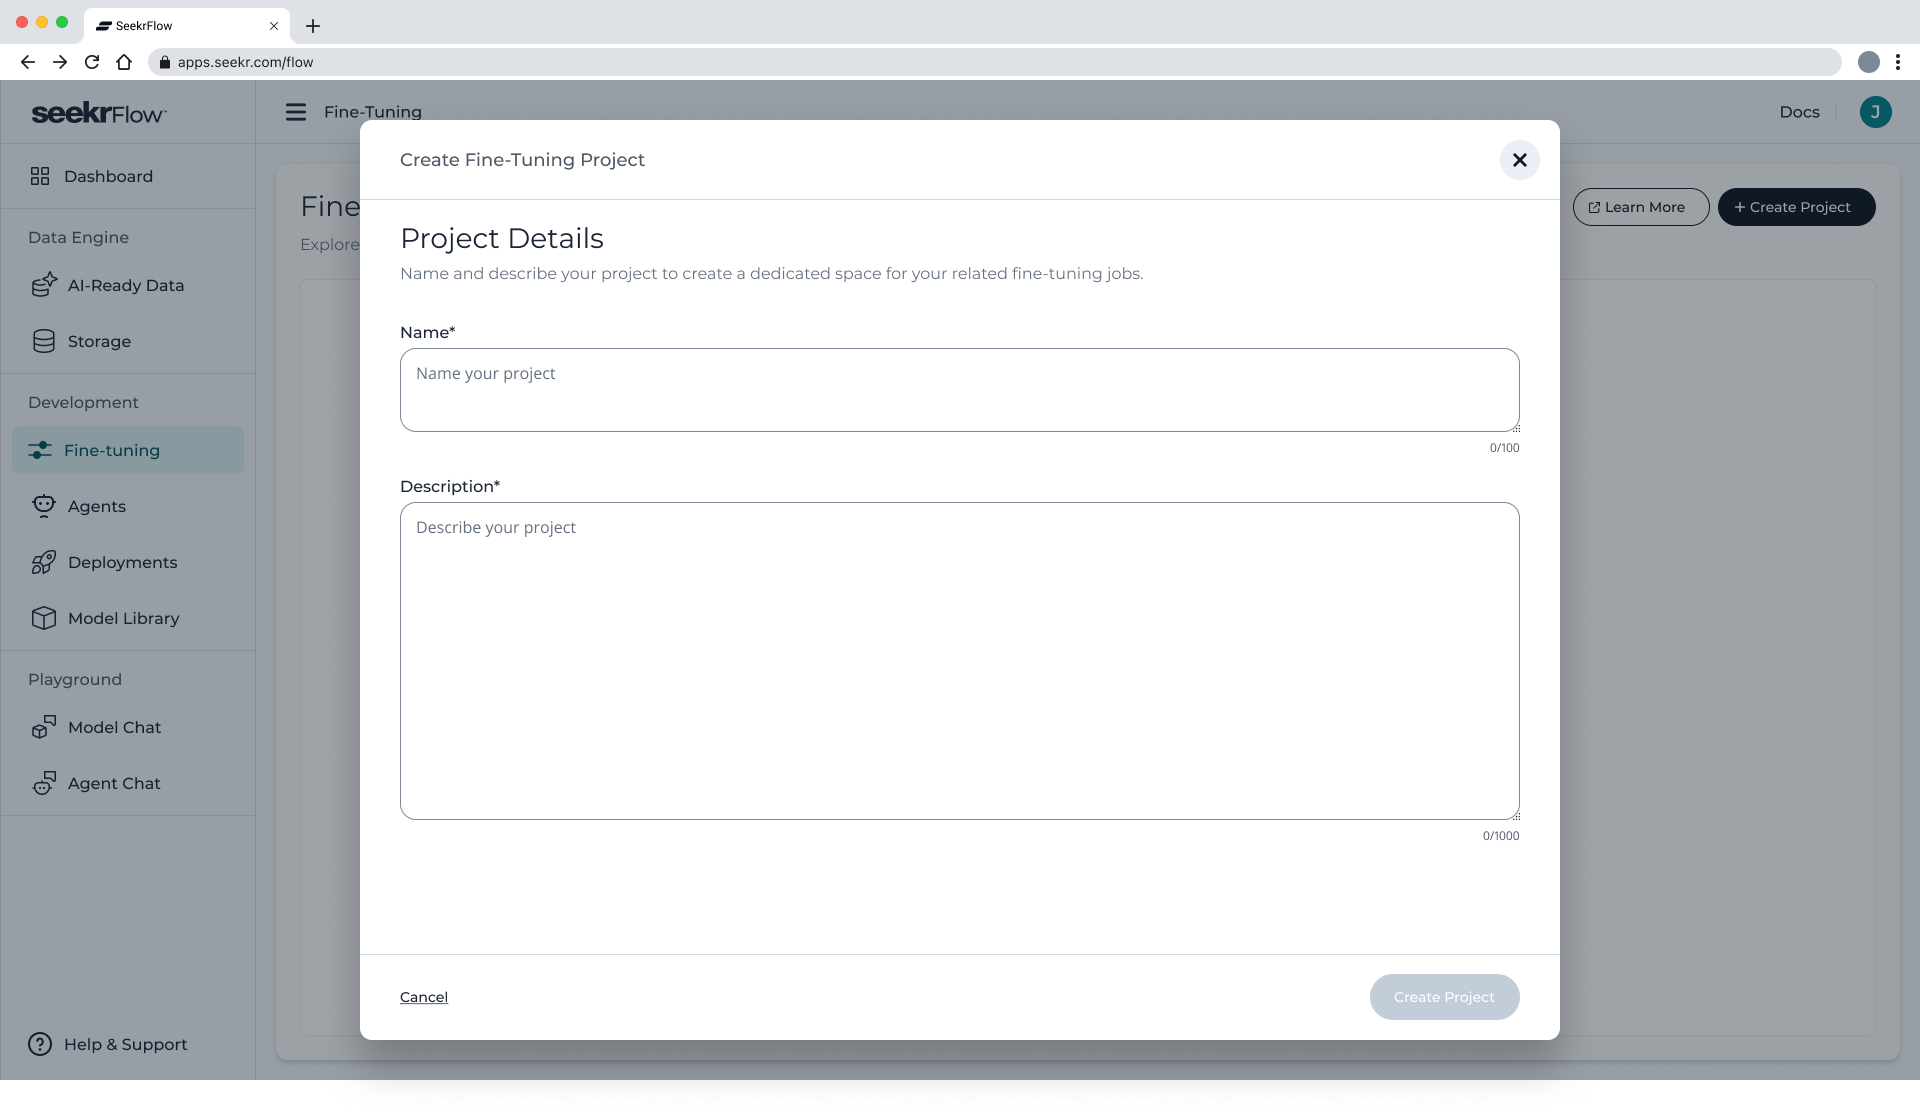
Figure 2. New project creation workflow with name and description input fields.
Project Dashboard overview
When you open a project, the dashboard shows everything related to that project’s fine‑tuning jobs in one place (Figure 3).
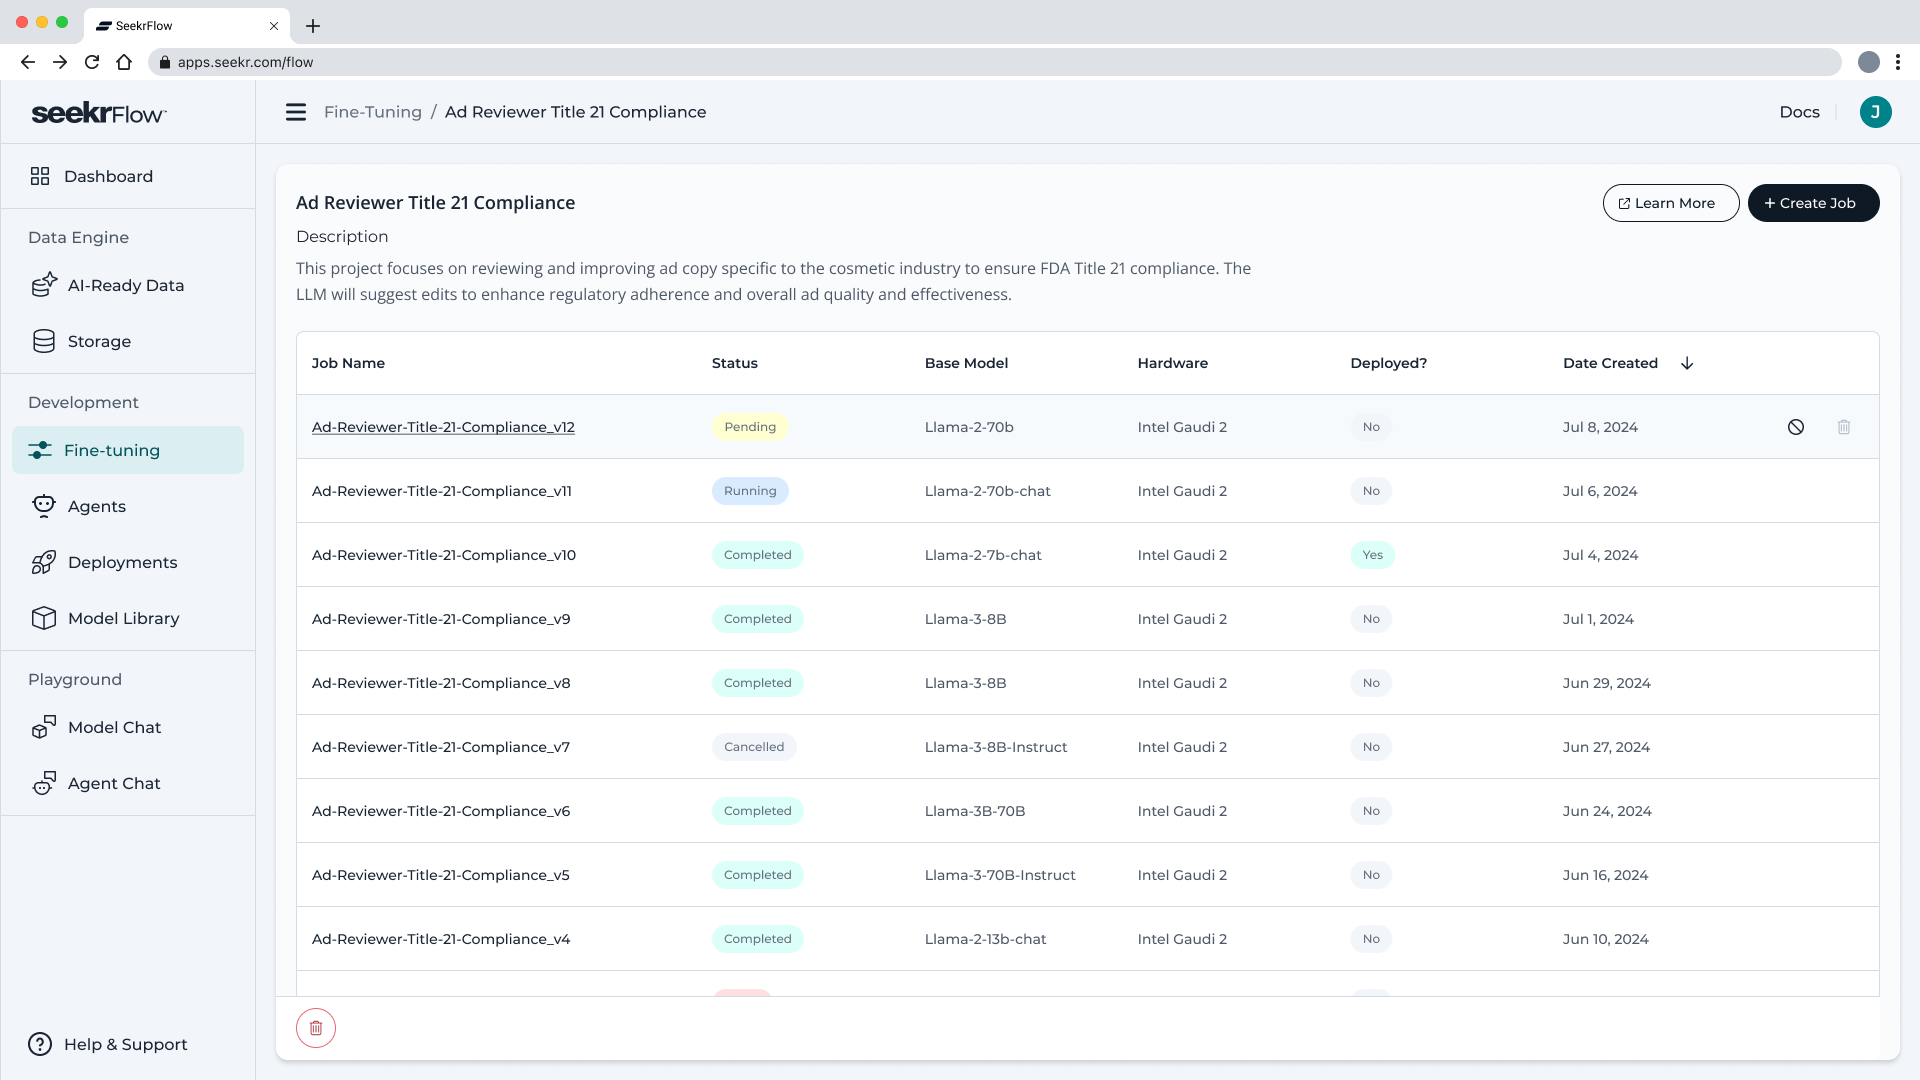
Figure 3. Project Dashboard with multiple fine‑tuning jobs, their statuses, and deployment indicators.
| UI Region | Description |
|---|---|
| Header bar | Displays the project name and description so you always know which initiative you’re viewing. The + Create Job button launches a new fine‑tuning run, and Learn More links to this guide. |
| Job table | Each row is a fine‑tuning job with columns:• Job Name – click to open job details.• Status – real‑time badge (Pending, Running, Completed, Cancelled).• Base Model – model checkpoint the job started from (e.g., Llama‑2‑70b).• Hardware – instance type (e.g., Intel Gaudi 2).• Deployed? – Yes/No badge indicating whether the model is serving in production.• Date Created & Last Modified – sortable timestamps for quick triage. |
| Row actions | Hover a row to reveal quick actions (⟳ retry, 🗑 delete). |
| Breadcrumb | Shows Fine‑Tuning / [Project Name] so you can navigate back to the projects list. |
The dashboard lets you compare experiments at a glance, promote the best jobs to production, and audit the lineage of each model version—all without dropping to the SDK.
Create a fine‑tuning job (wizard)
The + Create Job button launches a step‑by‑step modal wizard. The progress bar at the bottom shows your place in the flow.
| Step | What You Do | Screenshot Reference |
|---|---|---|
| Job details | Enter a Name (required) and Description (supports up to 1 000 chars). Keep names versioned (e.g., _v1). | Figure 4 |
| Select data | Choose an existing JSONL/Parquet file from the table or click Upload File and drag‑and‑drop a new file (≤ 100 MB). | Figure 5, Figure 6 |
| Hardware Config | Pick an instance size. For Intel Gaudi 2 you can select 1 Instance for lightweight jobs or 8 Instances for large datasets. | Figure 7 |
| Hyperparameters | Adjust sliders / fields for Epochs, Batch Size, Learning Rate, Sequence Length. Toggle Gradient Checkpointing or bfloat16 for memory savings. | Figure 8 |
| Review and Start | Confirm all selections in the summary card, then click Start Job. | Figure 9 |
After you click Start Job, the modal closes and the new job appears in the dashboard table with a Pending status (Figure 10). Status updates in real time.
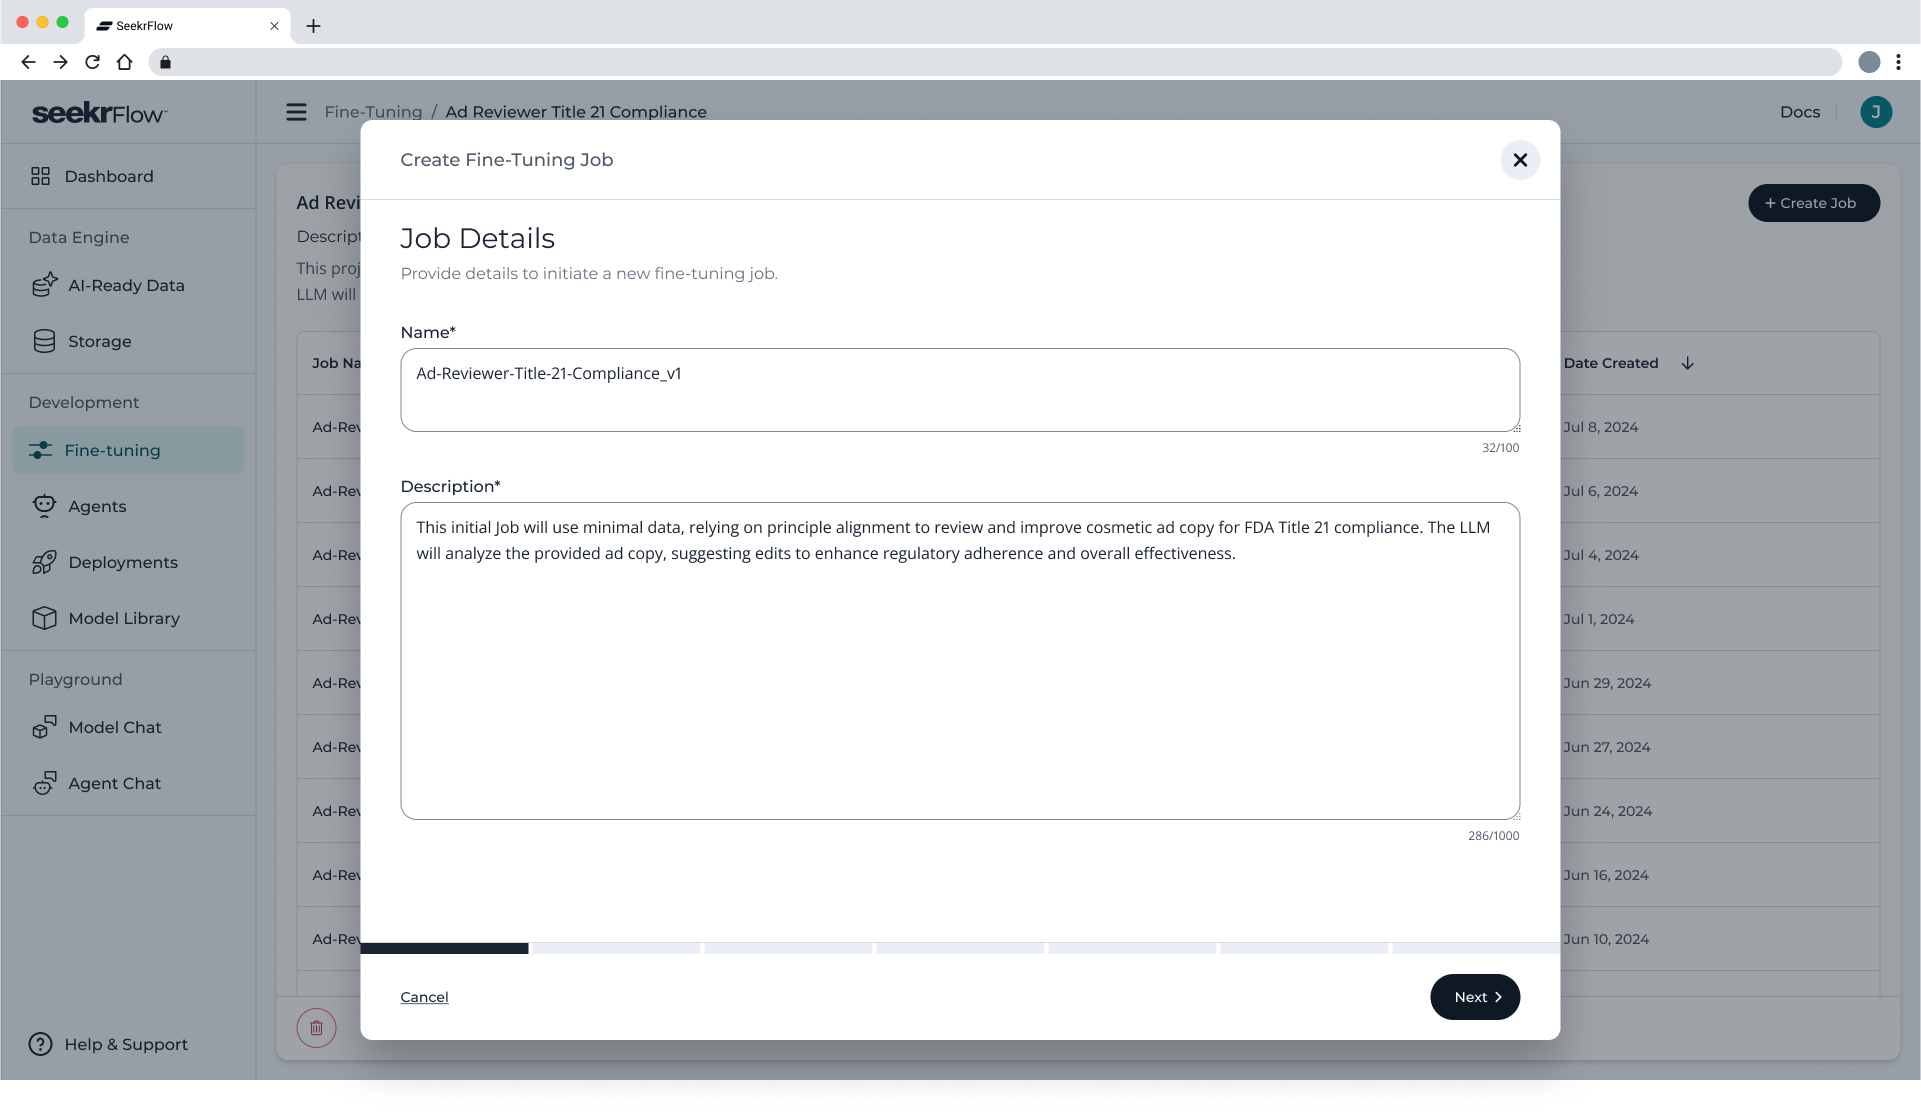
Figure 4. Create a new fine-tuning job by filling out the name and description.
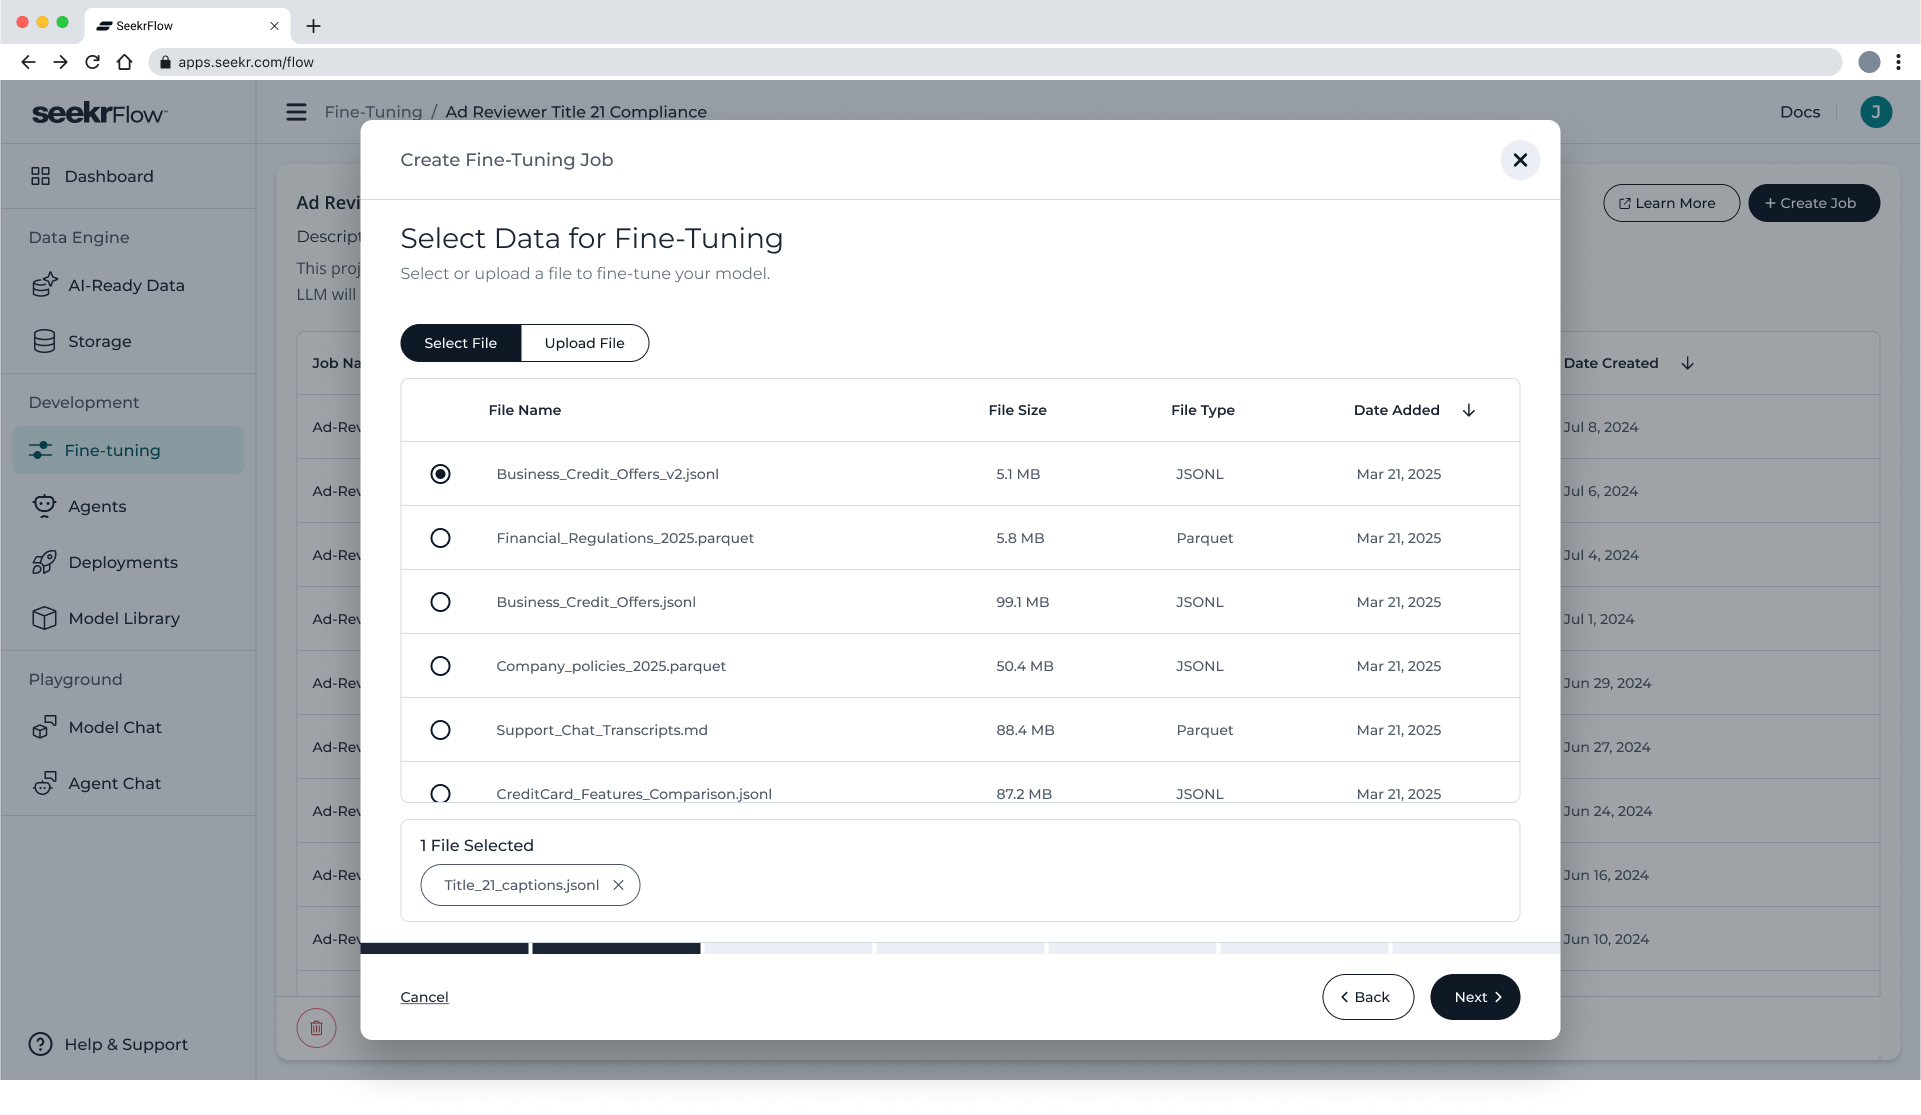
Figure 5. Select a previously uploaded or generated training dataset to be used for fine-tuning.
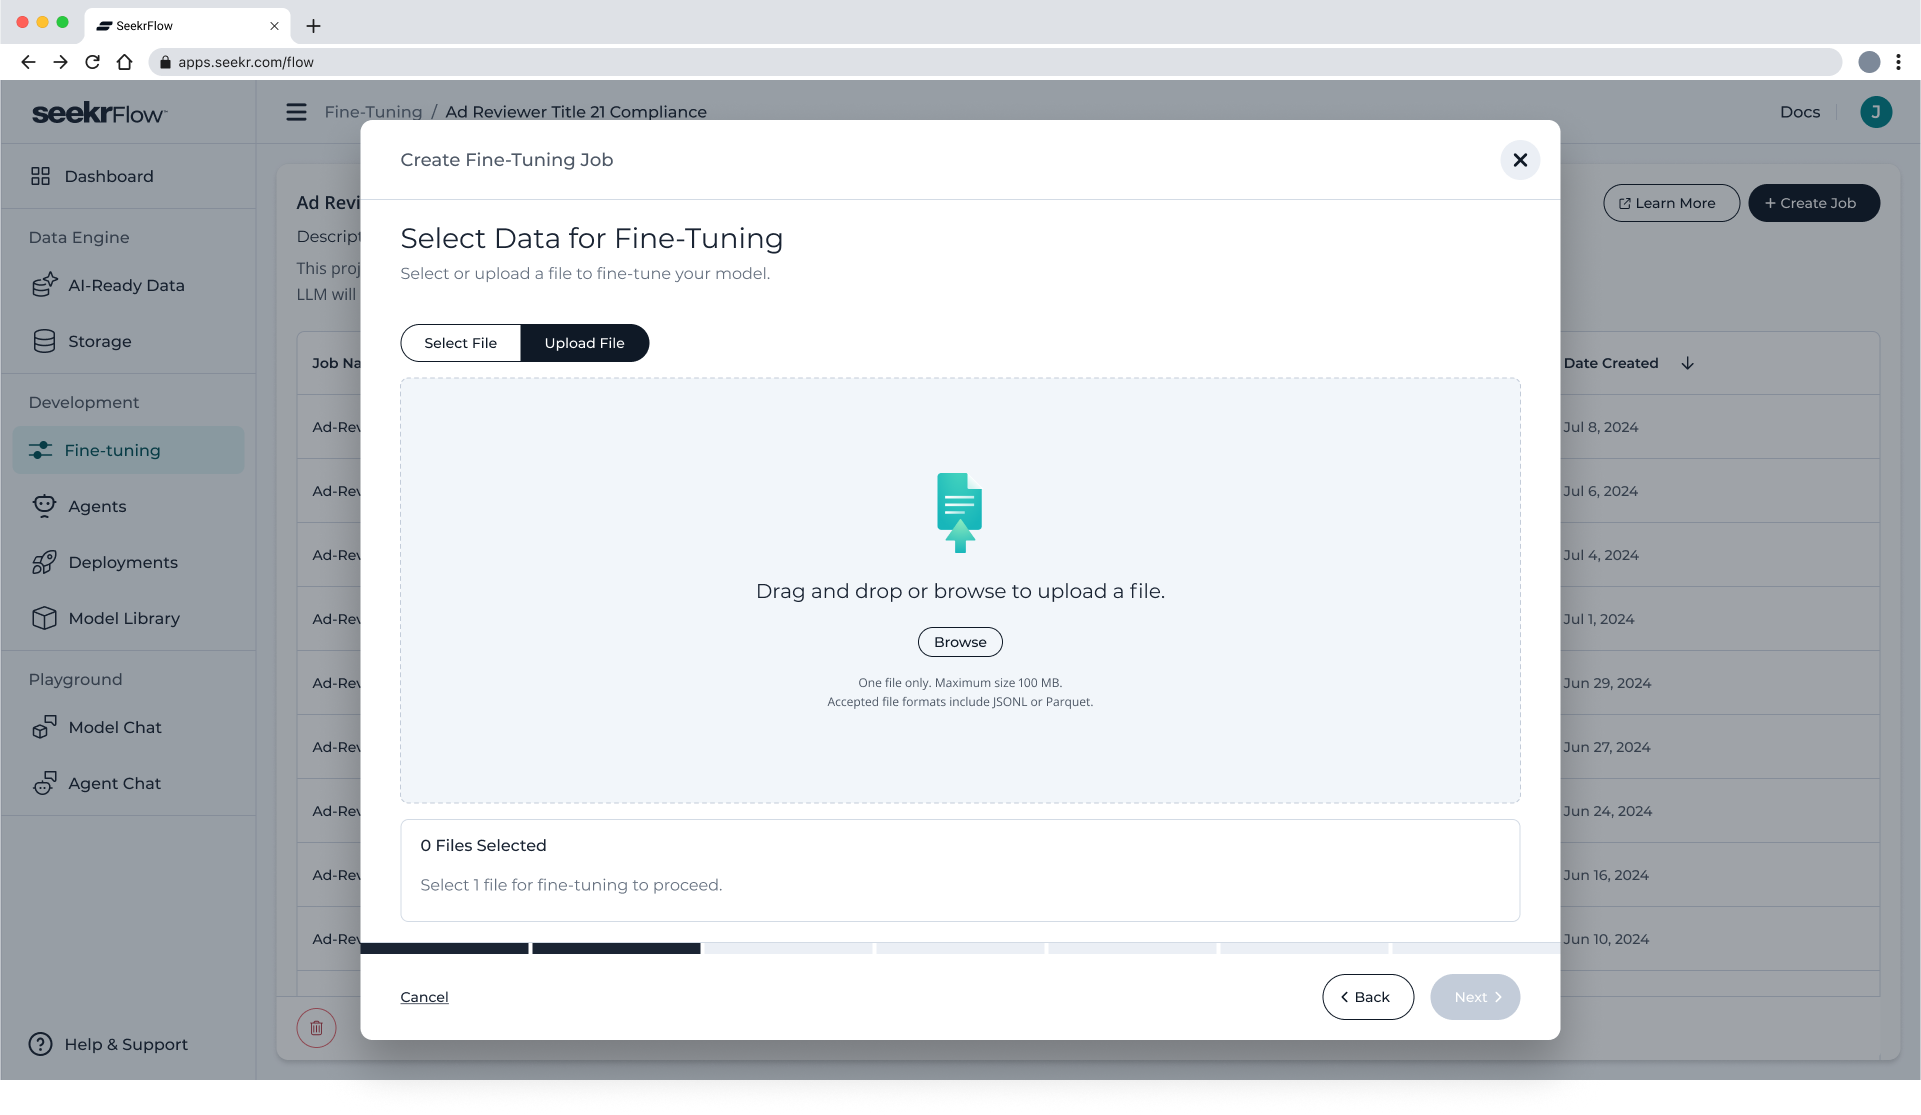
Figure 6. Upload a new training dataset to be used for fine-tuning.
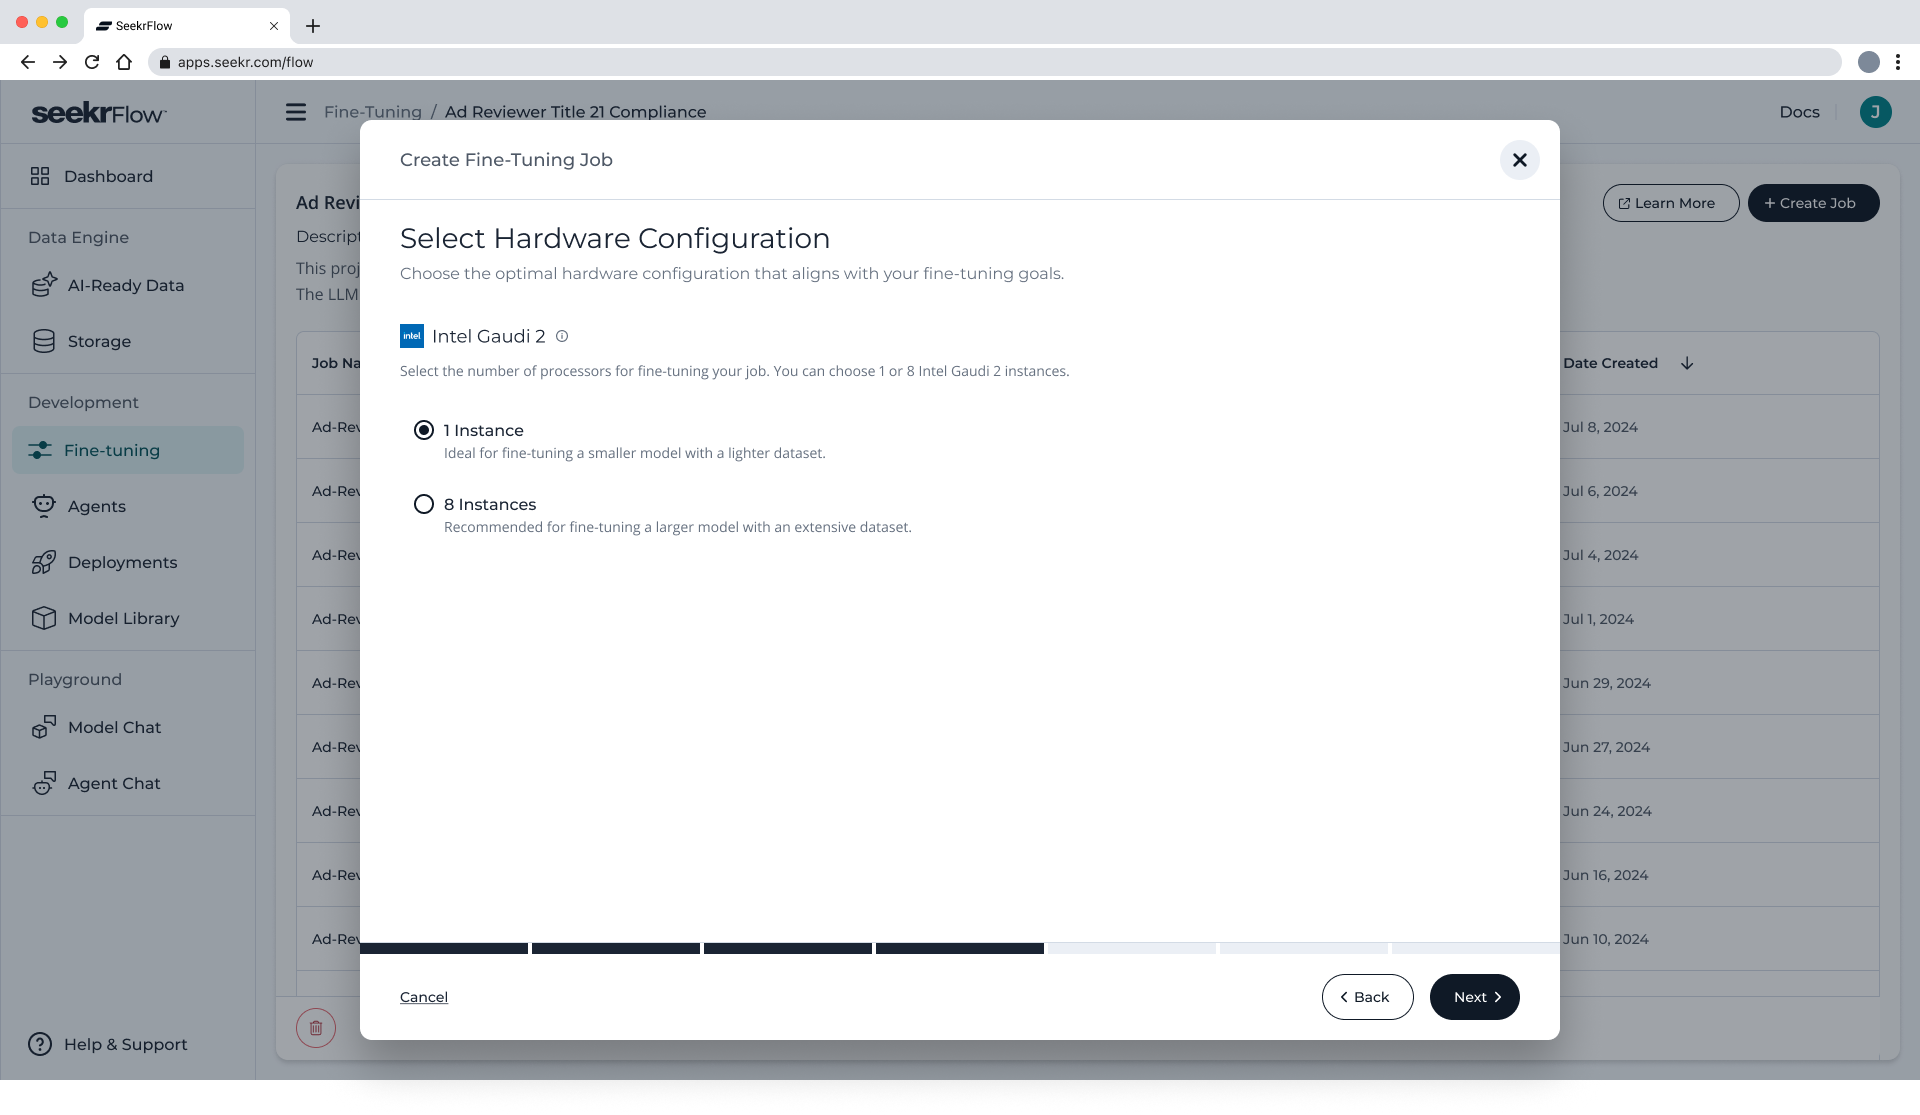
Figure 7. Select your hardware configuration for the fine-tuning job.
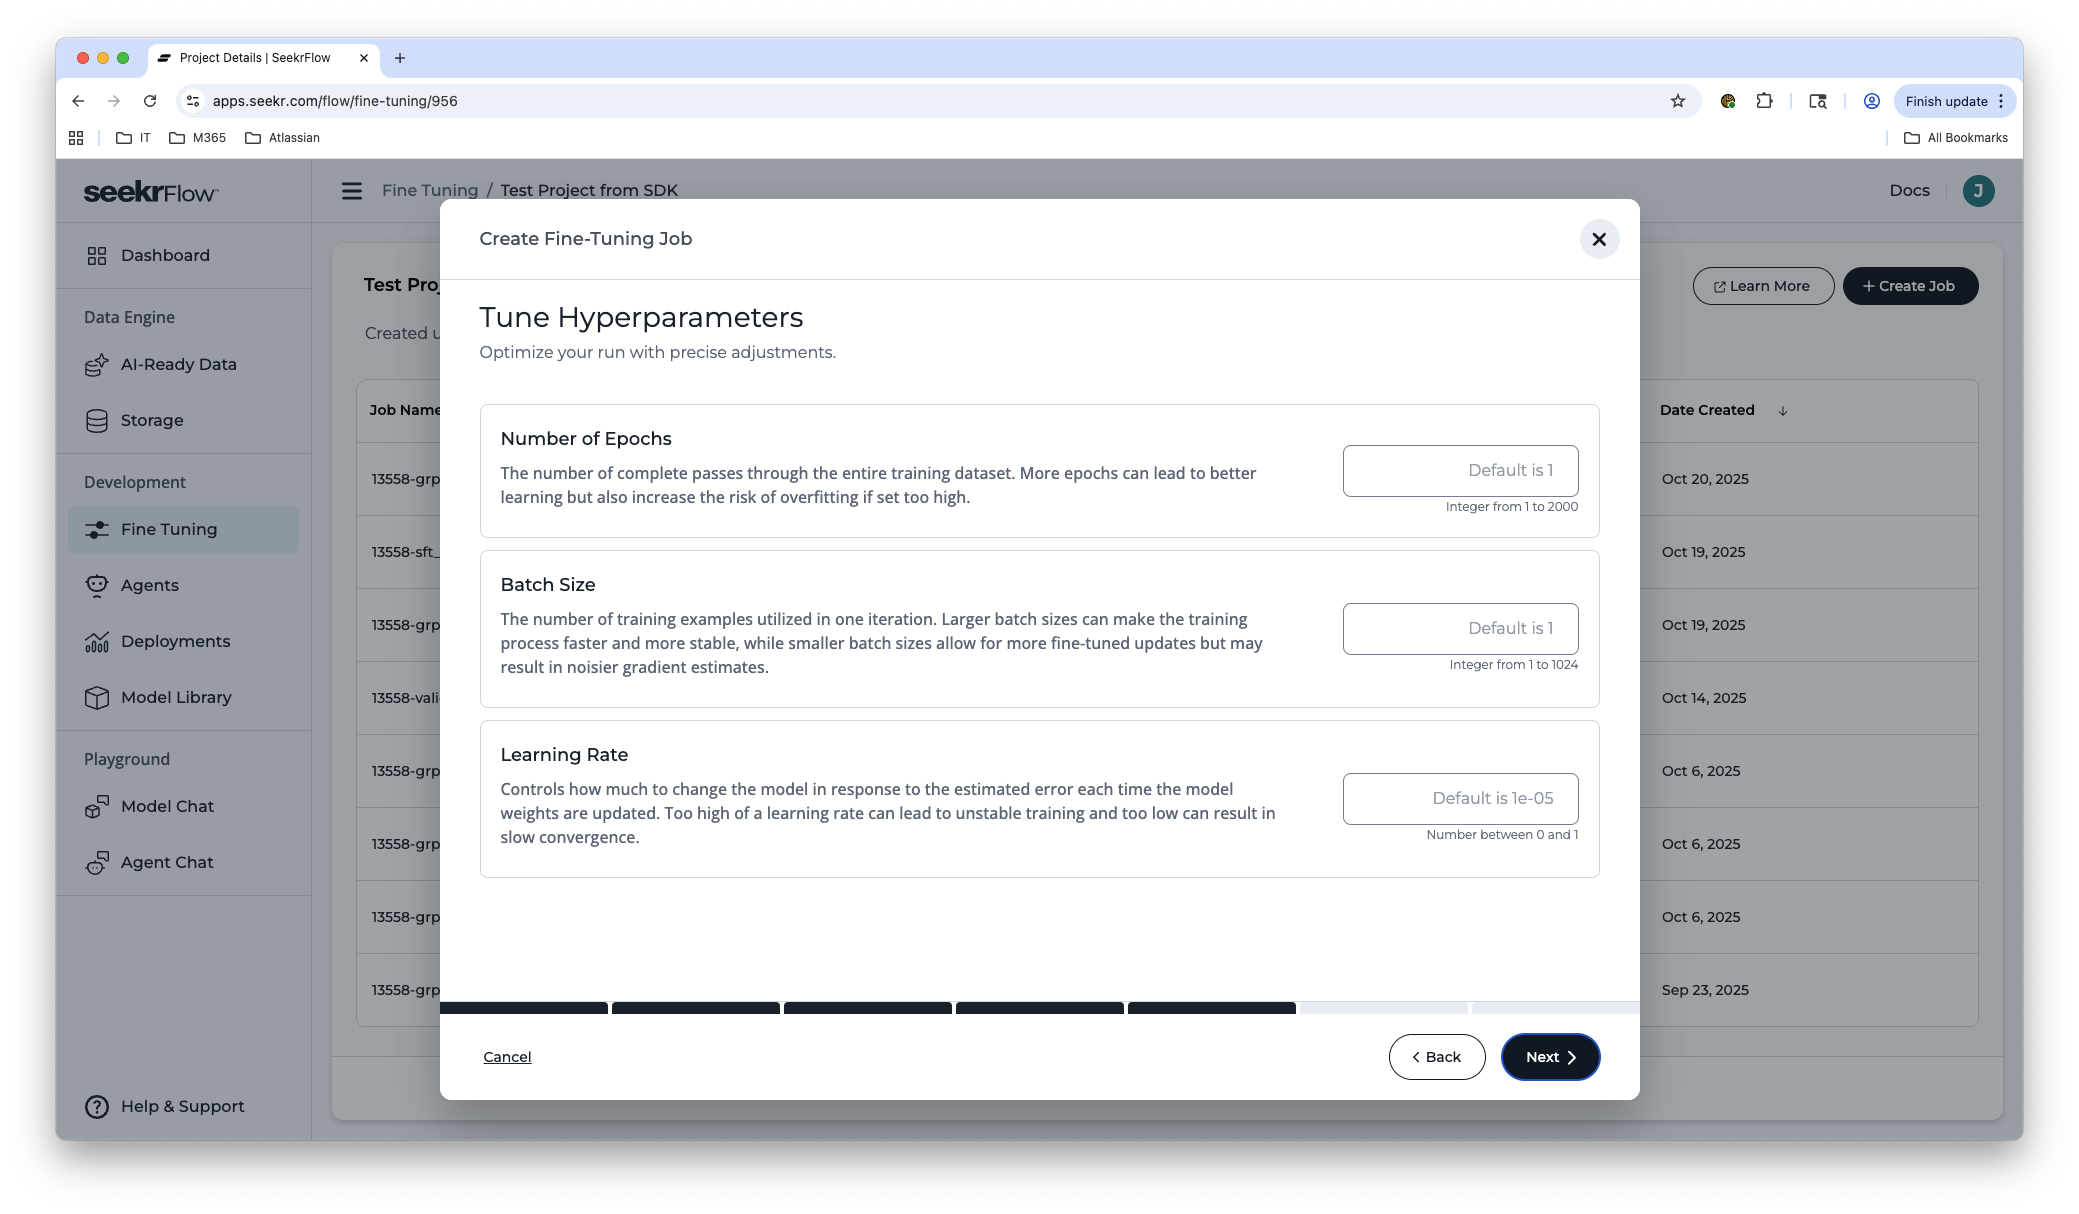
Figure 8. Select your hyperparameter configuration for the fine-tuning job. Please note that different configurations will product different results and vary in training time.
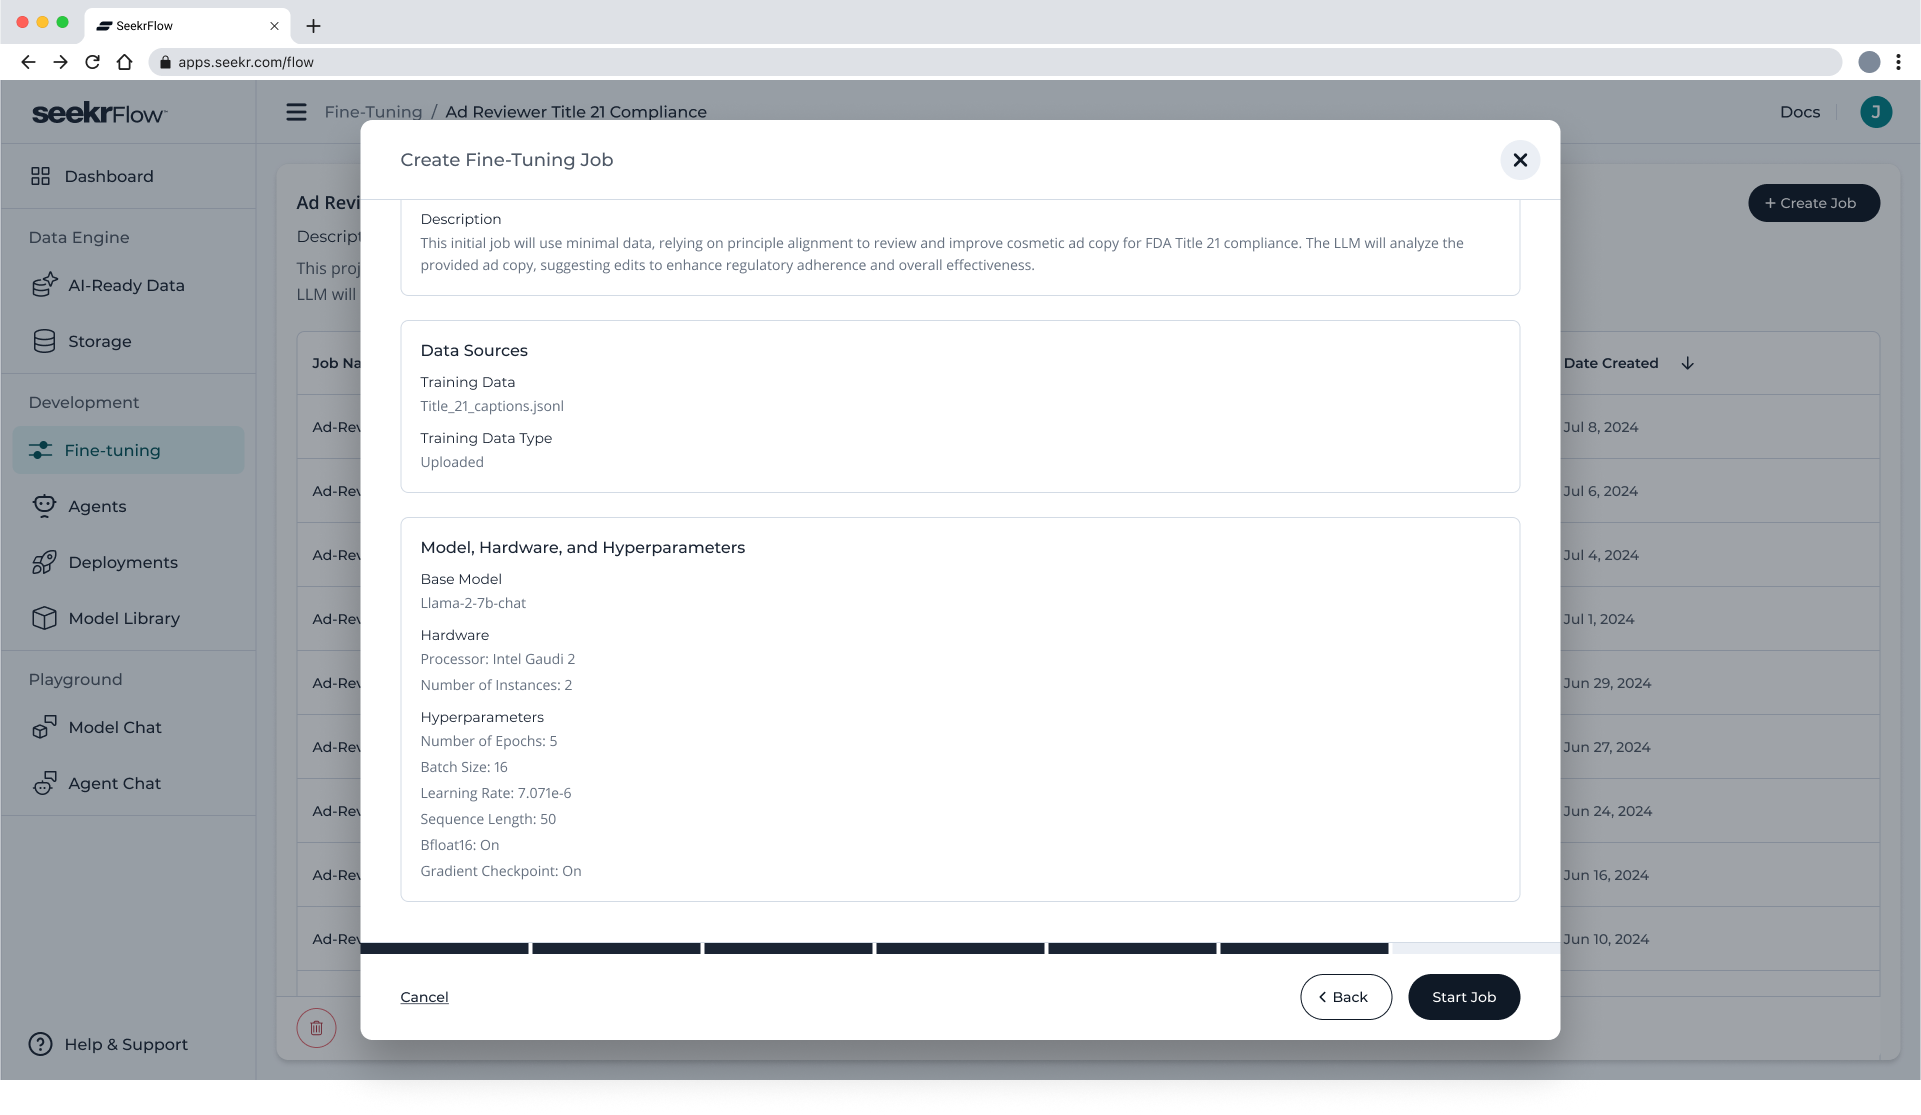
Figure 9. Review your configurations before starting the fine-tuning job.
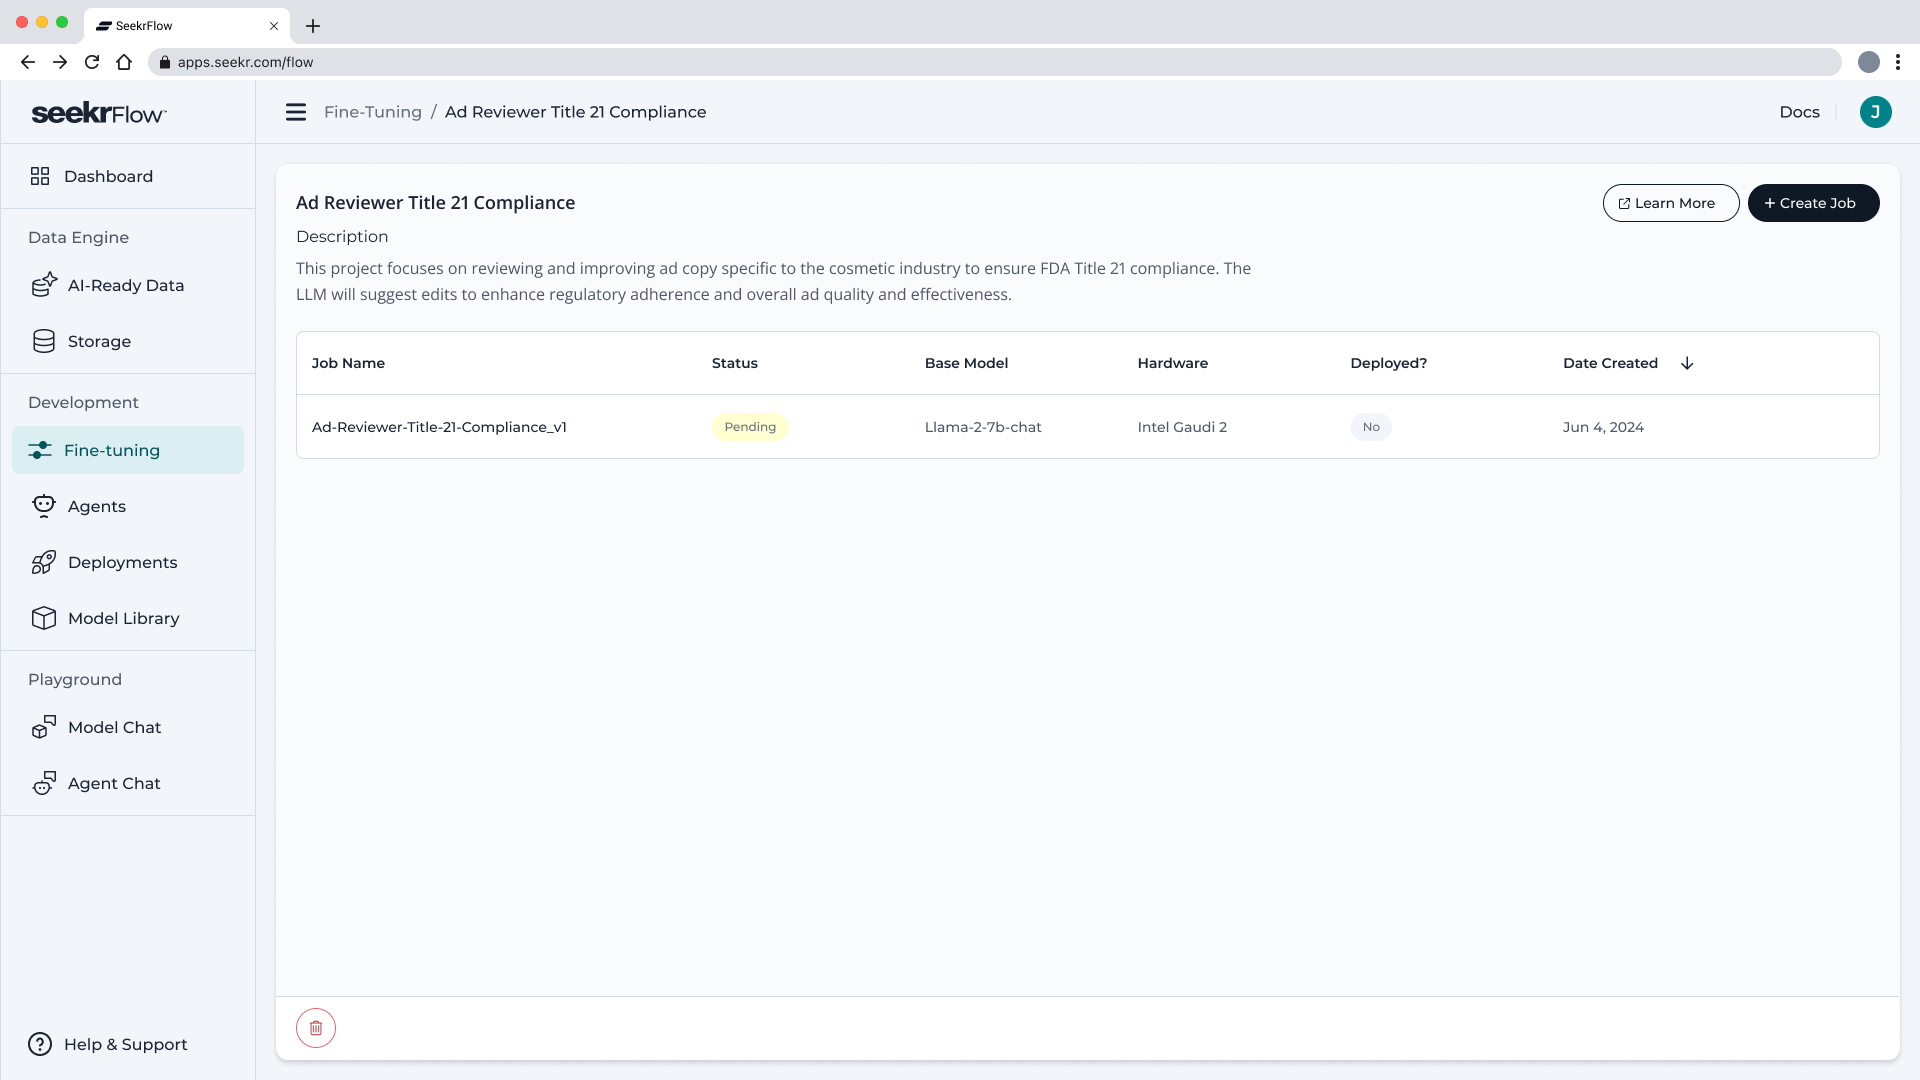
Figure 10. Your new fine-tuning job will appear as a new entry in the project.
Fine-Tuning Job Summary
Click a Job Name from the Project Dashboard to view its Job Summary page (Figure 10). This page aggregates everything you need to understand model performance and deployment history.
| Section | What It Shows |
|---|---|
| Job Details | Editable Name, immutable ID, current Status badge, timestamps (Date Created / Date Completed), and rich‑text Description. |
| Training Loss Chart | A line chart of loss vs. steps/epochs. Use the drop‑down How to Use This Chart for interpretation tips. |
| Data Sources | Link to the training file, data type (e.g., Context Grounded), and the full training prompt. Download icon exports the dataset for offline review. |
| Model, Hardware, and Hyperparameters | Base model checkpoint, hardware type/instance count, and every hyperparameter value chosen in the wizard. |
| Deployment Details table | All deployments derived from this job with Status (Active, Pending, Failed), dates, and quick links. |
| Action buttons | Deploy Again (top right) re‑opens the deployment wizard with parameters pre‑filled. |
| Event Timeline | Right‑hand feed of job and deployment events—queued, running, completed—with relative timestamps. |
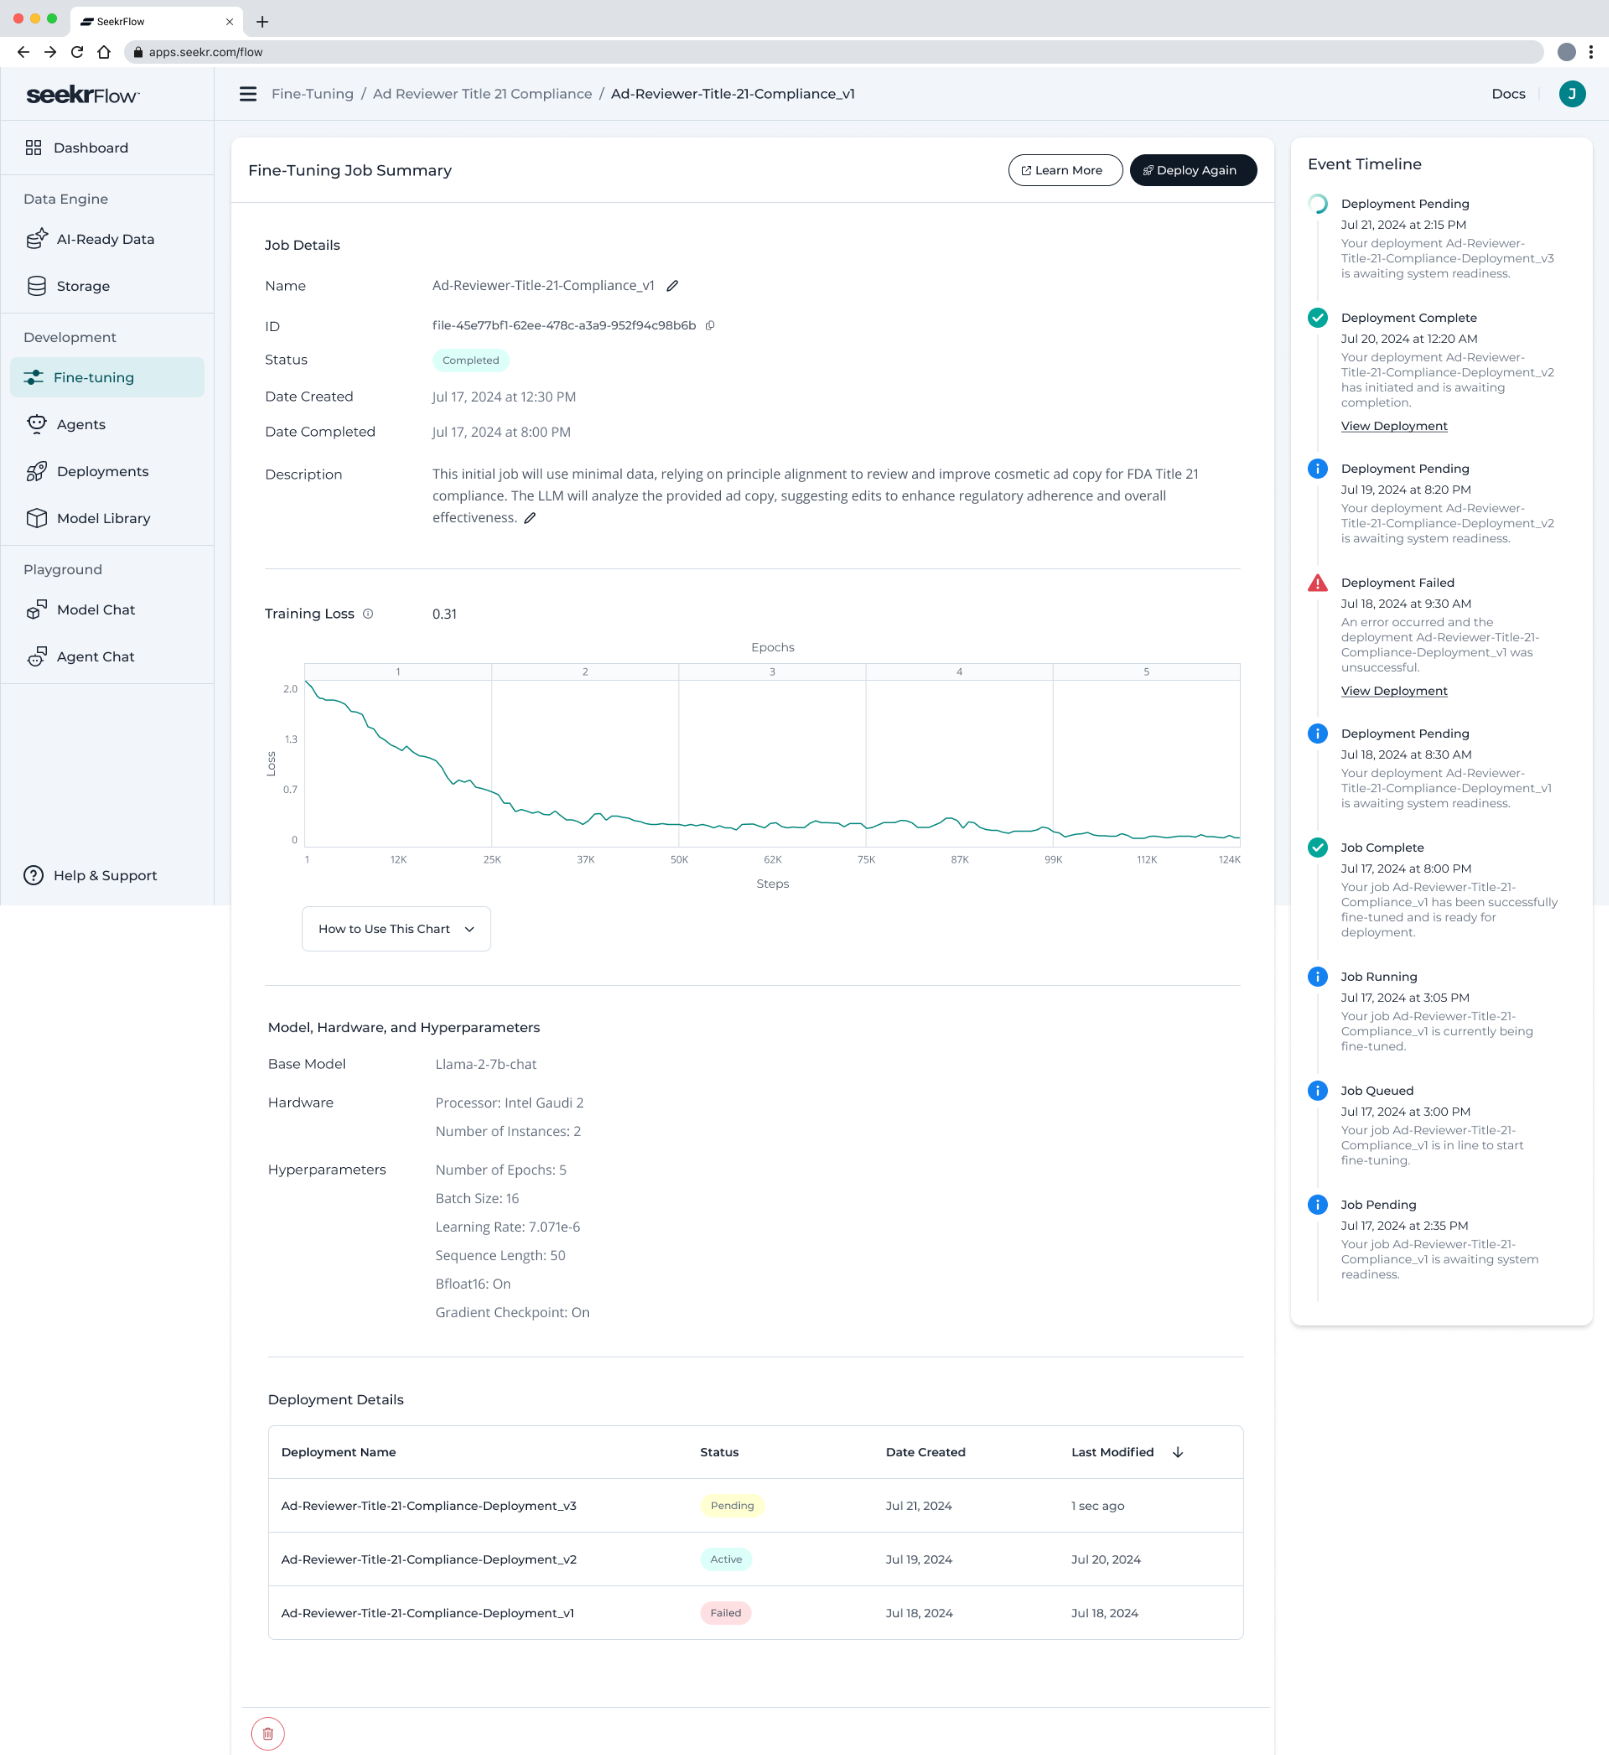
Figure 11. Fine‑Tuning Job Summary showing training metrics, data lineage, hyperparameters, and deployment history.
Updated about 1 month ago